
Blog · Guide
Installing DSH on Windows, and reproducing the V4 Pro benchmark setup
August 25, 2026 · dshbase · installer guide
This guide answers two questions: how do you actually install DeepSeek Harness on Windows, and how do you reproduce — or verify — the "best mode" everyone is benchmarking? Everything below follows a real Windows machine walkthrough.
What (and how much) you're installing
DeepSeek Harness (command: dsh) is a developer-preview agent runtime, not a model and not a chat wrapper. Its bet: everything is a plugin — model adapters, file tools, skills, sessions, storage, permissions, sandbox, the task loop, scheduling, even the web UI. The core runs on Cordis, and four built-in presets give you four very different working personalities.
Option 1: let an existing agent install it
If you already run Codex, Claude Code or similar, hand it this prompt:
Install DeepSeek Harness from the official npm package (@deepseek-ai/dsh). Check the Node.js and npm environment first and use only the official package. Install the current version, start the web UI, and confirm http://127.0.0.1:3080 is reachable. Then report the installed version, the start command and verification result. Do not read, echo or save my API key.
Option 2: manual install
- Node.js —
node --versionmust satisfy^22.19.0 || >=24.0.0(the tested machine used v24.13.0). Download from nodejs.org if missing; keep "Add to PATH" checked, then open a new terminal. - Global install — many tutorials suggest
npx @deepseek-ai/dsh web, but on this machine that refused to install. The reliable path wasnpm install -g @deepseek-ai/dsh. Then verify separately:dsh --version. Separating "install failed" from "start failed" saves a lot of confusion. - Start the web UI — in a fresh folder (say
dsh-first-agent), rundsh --profile web. You'll seedsh web: http://127.0.0.1:3080. Open it in a browser. Keep that terminal open — the web page is just the interface; the service lives in the terminal. Port taken?dsh web --port 8080, or--port 0to auto-pick. - Model + API key — first launch prompts for an API key (DeepSeek open platform), or configure it under Settings → models: add provider, paste key, pick model, save.
First steps that actually matter
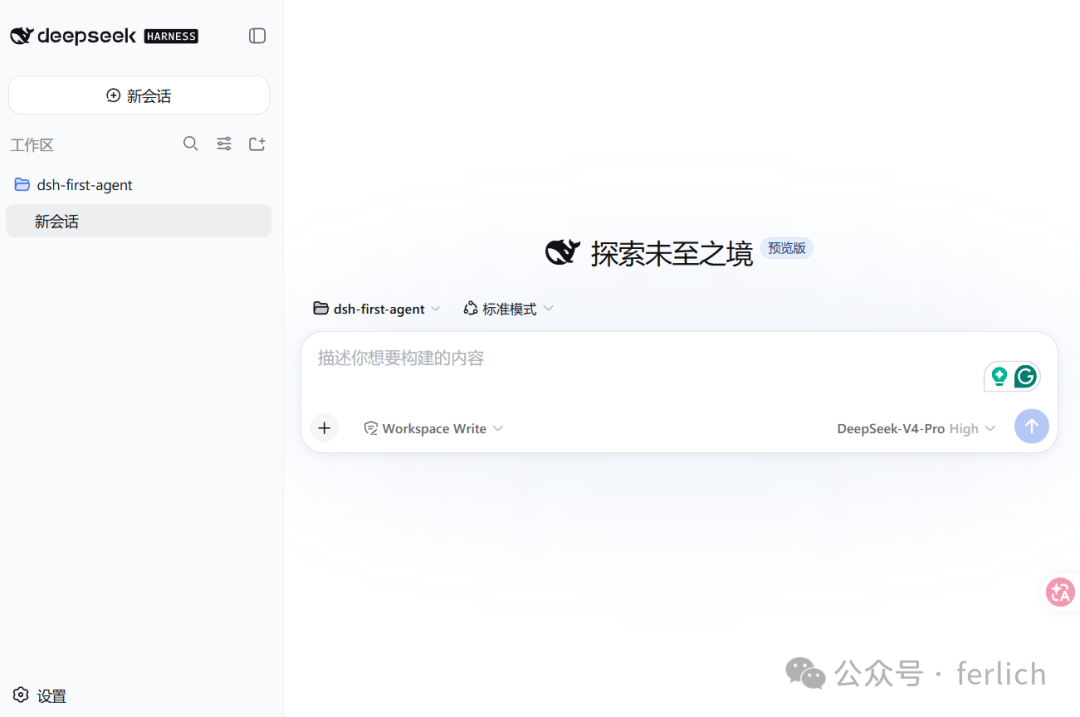
- The workspace is a file boundary, not a chat category. Add and select a workspace (e.g.
D:\dsh-first-agent). If the input box is greyed out, check the workspace first. - Left panel: workspace file tree + session list. Middle: chat, task process, input box — where you pick model, preset and permission.
- Sessions keep context and operation history: rename, search, resume, archive (archive ≠ delete), and Fork for comparing two approaches. Long thread?
/compact.
The four presets — and what plan mode is not
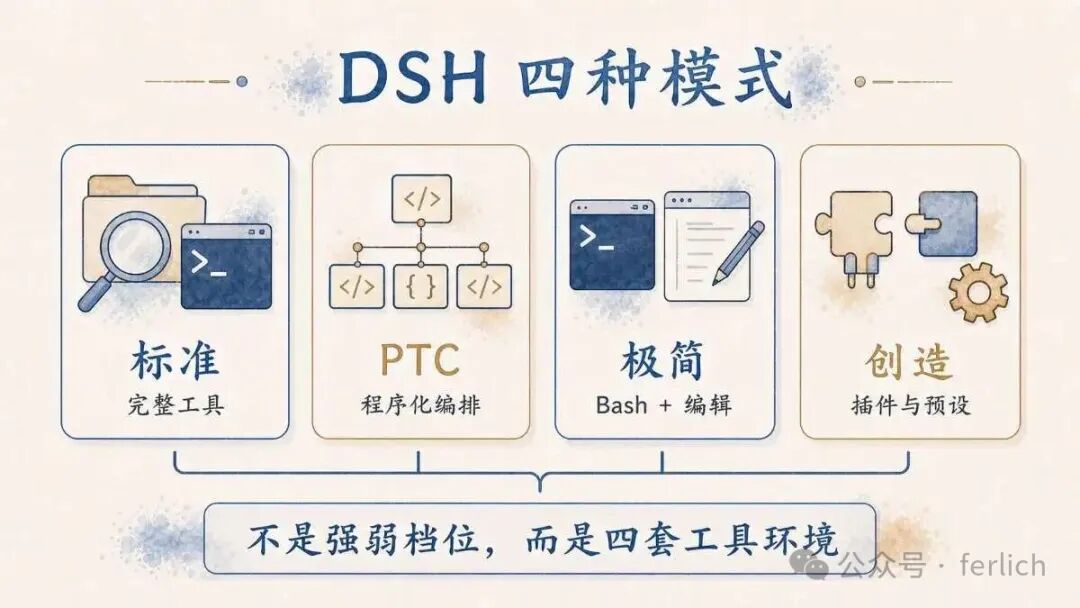
| Standard | Full coding agent: file edit, shell, file/web search, skills, plan, goals, subagents, workflows | Default for daily work — pick it first |
| PTC | Everything in Standard, plus the model can orchestrate multi-step tool calls as TypeScript via the Code Mode SDK | Tool-call-dense, repetitive flows |
| Minimal | Only persistent Bash + str_replace_editor | Benchmarks, teaching, model observation |
| Create | Standard + runtime inspection, plugin experiments, preset authoring | Extension dev — high trust level, keep it away from important workspaces |
Plan mode is not a fifth preset. Presets decide what tools a session has; /plan decides whether the agent investigates and proposes before executing. For your first real project: Standard + Read Only + plan mode. And about permissions: Read Only / Workspace Write / Full Access — Full Access isn't a "pro tier," it's the highest-risk option. Workspace Write bounds writes, but the agent can still read beyond it; check what it wants to read and whether it asks to escalate.
The V4 Pro benchmark controversy, decoded
DeepSeek's published numbers are strong — V4 Pro at DeepSWE 62.7 and CyberGym 83.3. Third-party boards and user reports show more variance: early-exit reasoning, missed steps in long tasks, run-to-run wobble. Both can be true at once, because a coding-agent score is not the model alone: system prompt, tool list, context management, terminal environment and acceptance checks all change the result.
Minimal mode is a special evaluation environment: a one-line system prompt, exactly two tools, no injected runtime context. Community tests have shown the same model/task going from roughly 91–93 (Standard/PTC) to 96–99 (Minimal) with similar reasoning settings. The task sets aren't public, so this doesn't prove Minimal is generally stronger — it proves V4 Pro's agent capability is sensitive to first-turn prompt and tool architecture. That's a more accurate framing than "it's only smart in Minimal mode."
Reproducing the benchmark setup, honestly
- Pick a verifiable task — a known bug, a function to implement, or "make the tests pass," with explicit: project path, allowed/forbidden files, test command, pass criteria, logs to keep. No "optimize my project."
- Fresh Minimal session — V4 Pro / Minimal / thinking Max / minimal permissions, no extra skills or project lore loaded. Windows note: Minimal exposes persistent Bash, not PowerShell — a broken Bash is an environment problem, don't score it as model failure.
- Build a control group — same code state, same task: A) Standard+High, B) Standard+Max, C) Minimal+Max. Run each at least 3 times on identical initial files; don't let the next run inherit edits from the previous.
- Record real metrics — auto-test pass rate, plan-completion rate, premature "done" claims, wall time, input/output tokens, tool-call steps, rework count. A reproduction report should state DSH version, model, preset, thinking level, OS, task version, repeat count and results — one screenshot proves nothing.
The fine print
Minimal has no file/web retrieval, no skills, no planning and no context compression. In one community project test it was ~10 minutes faster but burned more input tokens (≈5.2M → 5.9M); in another long task, V4 Pro still marked unfinished items as done even with Max planning + High execution. For real projects the steady combo remains: V4 Pro + Standard + High — use Max + plan mode to shape the approach, High to execute, then a separate round for testing and independent review.